

In this simple guide, I'll show you how to change the DNS settings on Windows 10.
- Click on the Start icon.
- Go to the Settings page.
- Click on the Network & Internet
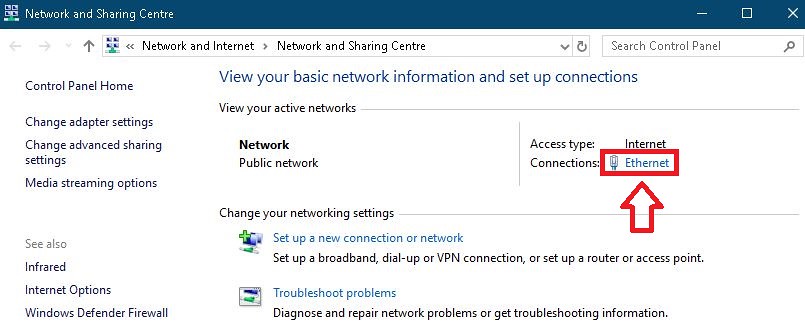
- Click on the Network and Sharing Centre
- In the window that appears, click on the Ethernet (or Wi-Fi)
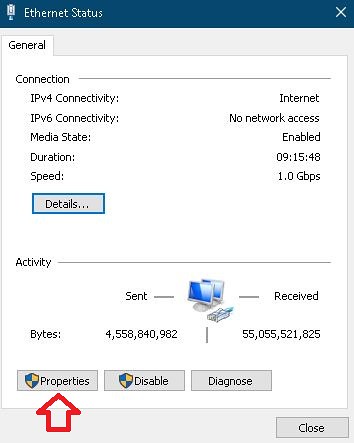
- Click on the Properties.
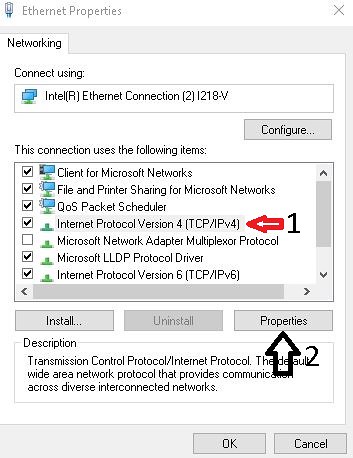
- Select the "Internet Protocol Version 4 (TCP/IPV4)" and click on the Properties.
- Click on the "Use the following DNS server addresses" option.
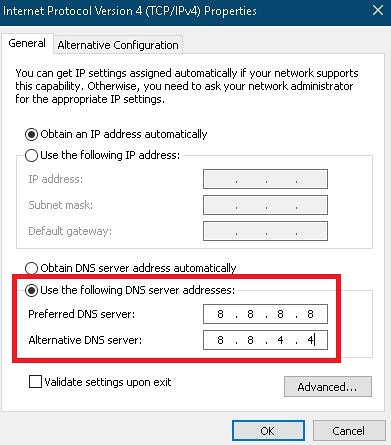
- Type your "Preferred" and "Alternative" DNS server addresses.
Google DNS server addresses: 8.8.8.8 / 8.8.4.4
CloudFlare DNS server addresses: 1.1.1.1 / 1.0.0.1 - Click on the OK. After that Close.
great sir problme solve
thank you so much