

In this guide, I listed a few tweaks and tips to fix the performance issues in F1 2019 video game, such as spikes, low FPS, stuttering, lagging, freezing, fps drop.
There are 16 ways to improve your frame rates in F1 2019 video game.
System Requirements for Running F1 2019
| Minimum System Requirements | Recommended System Requirements | |
| CPU | Intel i3 2130 / AMD FX4300 | Intel i5 9600k / AMD Ryzen 5 2600x |
| GPU | Nvidia GTX640 / HD7750 | Nvidia GTX 1660ti / RX590 |
| DirectX | DirectX 11 | DirectX 12 |
| RAM | 8 GB RAM | 16 GB RAM |
| Storage | 80 GB available space | 80 GB available space |
| OS | 64 bit Versions of Windows 7, Windows 8, Windows 10 | 64 bit Version of Windows 10 |
1) Best Graphics Settings for F1 2019
You can skip this step if you don’t want to change graphics settings. These High Performance graphics settings are for PCs which close to the minimum system requirements.
If you have a good PC, you can increase the settings slightly.
Go to in-game graphics options and make sure the settings are as follows.
GAME OPTIONS > Settings > Graphics Options > Video Mode
| High Performance | Performance | |
| Display Mode | Fullscreen | Fullscreen |
| VSync | Off | Off |
| Frame Rate Limit | Off | Off |
| Anti-Aliasing | Off | TAA |
| Anisotropic Filtering | Off | Off |
| HDR | Off | Off |
Confirm Changes
GAME OPTIONS > Settings > Graphics Options > Advanced Setup
| High Performance | Performance | |
| Lighting Quality | Low | Medium |
| Post Process | Low | Low |
| Shadows | Ultra Low | Medium |
| Smoke Shadows | Off | Off |
| Advanced Smoke Shadows | Off | Off |
| Particles | Off | Medium |
| Crowd | Low | Low |
| Mirrors | Low | Ultra High |
| Ambient Occlusion | Off | Off |
| Screen Space Reflections | Off | Off |
| Texture Streaming | Ultra Low | High |
| Vehicle Reflections | Ultra Low | Medium |
| Weather Effects | Low | Low |
| Ground Cover | Low | Low |
| Skidmarks | Off | Off |
| Skidmarks Blending | Off | Off |
| SSRT Shadows | Off | Off |
Confirm Changes and Exit the game.
If you encounter screen tearing problem during the gameplay, you should enable the VSync. If you have a monitor with G-SYNC or FreeSync, you can activate them instead of Vsync.
In the meantime, you can try running the F1 2019 with DirectX 11 instead of DirectX 12. It can improve performance. DirectX 11 was better when I tested it.
2) Steam Launch Options
- Go to the list of games in the Steam library.
- Right-click the F1 2019 and click the Properties.
- Click the Set Launch Options in the General tab.
- Type or paste the following commands into the box in the incoming window.
-USEALLAVAILABLECORES -high
3) Update Your Graphics Drivers
You should keep your computer’s graphics drivers updated.
People who have an NVIDIA graphics card can download and install their new drivers here.
People who have an AMD graphics card can download and install their new drivers here.
4) NVIDIA Control Panel Settings
- Open NVIDIA Control Panel
- Go to the Adjust image settings with preview tab.
- Click the “Use my preference emphasising“ (If you have a mid&high end pc, Let the 3D application decide)
- Put the bar in Performance mode.
- Apply

- Click the Manage 3D settings
- Click the Program Settings
- Click the Add
- Select the F1 2019 from the list, then click on the “Add Selected Program” button.
- After, make the following settings
Power management mode: Prefer maximum performance
Virtual Reality pre-rendered frames: 1 - If you have a notebook, make sure you have selected the “High-performance NVIDIA processor” on preferred graphics processor.

- Apply and close the NVIDIA Control Panel.
Effect of the “Power management mode” setting differs between GPUs. If these settings made your FPS worse, just set the “Power management mode” to “Optimal power“. After that, it will increase. You can test it.
5) AMD Radeon Settings
- Open the AMD Radeon Settings window.
- Click on the Gaming tab.
- Then click on Global Settings.
- Go to the Anti-aliasing mode, choose Override application settings.
- Click on the Anti-aliasing level, so make sure you have selected the 2X
- Go to the Anisotropic Filtering Mode and turn it on.
- Then, click on the Anisotropic Filtering Level, so make sure you have selected the 2X.
- Click on the Texture Filtering Quality and select the Performance.
- Now, click on the Wait for Vertical Refresh and select the Always off.
- Click on the Tessellation Mode and select the Override application settings.
- Finally, click on the Maximum Tessellation Level and select the 32x or lower.

6) Intelligent Standby List Cleaner
The “Intelligent standby list cleaner” application will monitor and clear the memory standby list when it is > 1000mb (1gb). It will help players to fix stutters in games.
- Download the Intelligent standby list cleaner
- Run the 7-zip file.
- Extract to a folder.
- Go to the that folder.
- Run the “Intelligent standby list cleaner ISLC” application.
- Check the “Start ISLC minimized and auto-Start monitoring”
- Also, check the “Launch ISLC on user logon”
- Now, click on the Start button
- Minimize

7) Full-screen Optimizations & High DPI in Windows 10

- Go to the folder where the game is installed.
- Right-click on the F1_2019.exe application
- Hit the Properties
- Tick “Disable full-screen optimizations” on the Compatibility tab.
- After that, click on the “Change high DPI settings” button.
- Under the “High DPI scaling override” section, tick the “Override high DPI scaling behavior“
- Use the “Scaling performed by:” drop-down menu and select the “Application”
- Click on the OK and again OK.
- You must also set the same things for F1_2019_dx12.exe.

8) Power Options
If the CPU cooler is not enough, you can skip this setting. Processor temperature may increase by 5-6 degrees.
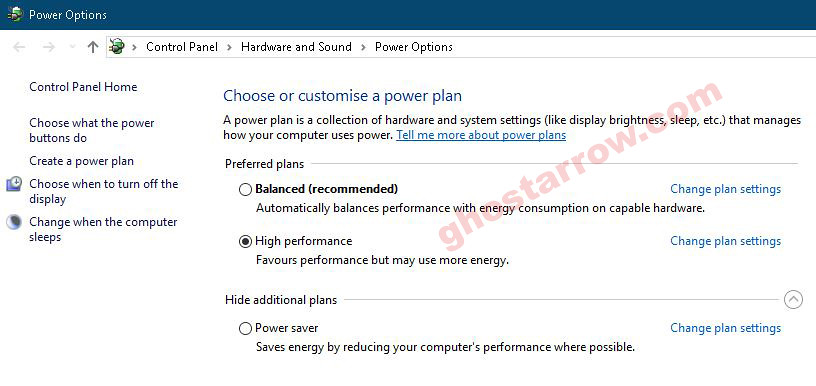
- Right-click the Windows icon on the bottom left.
- Click the Power Options
- Click the Additional power settings
- Select the High performance on the Preferred plans tab.
- After, click the Change plan settings link next to High performance.
- Tap on the Change advanced power settings
- Find Processor power management in the incoming list, click the + icon on the left side.
- Set Minimum processor state and Maximum processor state to 100%
- Click on the OK
9) Game Mode
- To turn off Windows 10 game mode, click the Start icon to bring up the Start menu. Then open the Settings.
- Click the Gaming
- On the Game Bar tab, set the “Record game clips, screenshots and broadcast using Game bar” to Off.
- On the Captures tab, set the “Record in the background while I’m playing a game” to Off.
- On the Game Mode tab, set the “Game Mode” to Off.
If you are using an older version of Windows 10, you may not see the Game Mode settings. In this case, you can configure the settings directly in the Registry.
- Press the Windows logo key and R key simultaneously on your keyboard.
- Type regedit
- Press the Enter key.
- The Registry Editor will open. In the left panel, Navigate to HKEY_CURRENT_USER\Software\Microsoft\GameBar
- Right-click inside the panel and select New
- Click on the DWORD (32-bit) Value

- Rename the New Key to AllowAutoGameMode
- Right-click on the AllowAutoGameMode
- Select the Modify…
- Set the “Value data” to 0
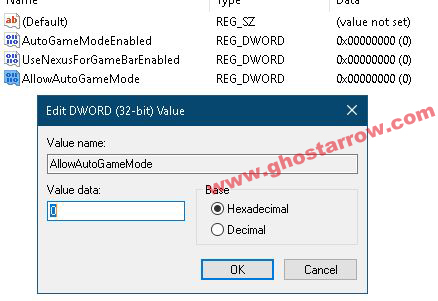
- Click on the OK button.
- Close the Registry Editor.
- Restart your PC.
10) Windows Performance Options
- Type performance in the search section of Windows, click to Adjust the appearance and performance of Windows from the results.
- Select the Adjust for best performance from the options in the Performance Options window that opens.
- Click OK

11) Cleaning Temporary Files
- Simultaneously press the Windows logo and R keys.
- Type %temp%
- Press Enter key.
- Delete everything in the Temp folder that opens. You can skip undeleted.
- Again, Simultaneously press the Windows logo and R keys.
- Type temp
- Press Enter key.
- Delete everything in the folder that opens.
- Again, Simultaneously press the Windows logo and R keys.
- Type prefetch
- Press Enter key.
- Delete everything in the Prefetch folder that opens.
Finally, empty the Recycle Bin
12) SSD
If you have a Solid-State Drive, I recommend that you install the game on the SSD or move the game files to the SSD.
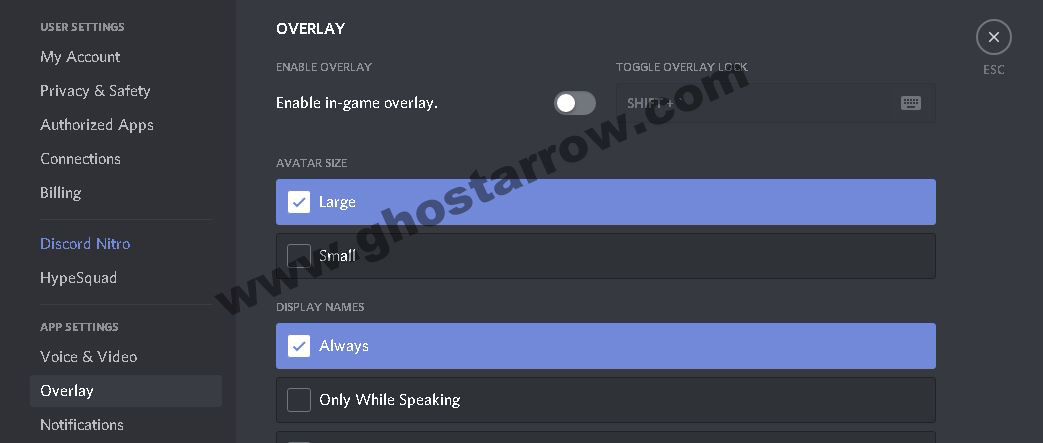
13) Optimize the Discord
If you are using Discord, disable the Hardware Acceleration and in-game overlay.
- Open Discord
- Go to the User Settings
- Then, go to the Appearance tab.
- Uncheck the Hardware Acceleration.

- Go to the Overlay on App Settings tab.
- Make sure unchecked the “Enable in-game overlay”
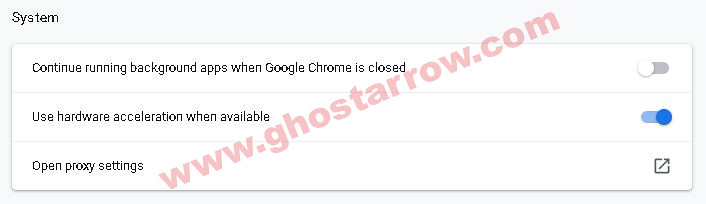
14) Optimize the Google Chrome
If you’re using Google Chrome, you’ll need to make this setting.
- Go to settings page in Chrome
- Click the Advanced
- Go to the System tab
- Finally, uncheck the “Continue running background apps when Google Chrome is closed”
15) Background Processes
You should close all unnecessary Apps, such as Chrome, OneDrive. Also, if the Discord is idle, you should quit Discord.
Also, you can use the CCleaner to go through your startup and scheduled tasks, and disable everything that you consider unnecessary.
16) Increase The Priority
You need to adjust this setting every time you enter the game.
- Launch the game.
- Simultaneously press the ALT and TAB keys to minimize the game.
- Open the Task Manager
- Click on Details Tab
- In the list, find the F1_2019.exe or F1_2019_dx12 application.
- Right-click on the F1_2019.exe or F1_2019_dx12 application and Set priority to High.
If you facing stuttering issue in the game after doing this, don’t do the High priority setting. Set it to Normal.
Thanks. Fixed my stuttering issue with F1 2019
CPU: AMD FX-8320
GPU: RX480
Thank you for the detailed steps.
I followed the instructions but unfortunately the game is not working at all now.
I have a Windows Surface pro with 2GB Intel HD Graphics 520 and an 8GB NVIDIA GeForce GTX 965M.
The problem is that when i open the game, it only uses the Intel Card and 0% of the NVIDIA, i verified this in the Task Manager.
All drivers and software are up to date.
I am struggling to find a solution.
The Nvidia control panel might be bugged.