
In Star Wars Battlefront II, there is no way to disable the microphone in game settings. So voice chat is always on, and everyone in the group can hear what we're talking about. I have found two different methods to solve this issue. Method 2 solved my problem.
Method #1
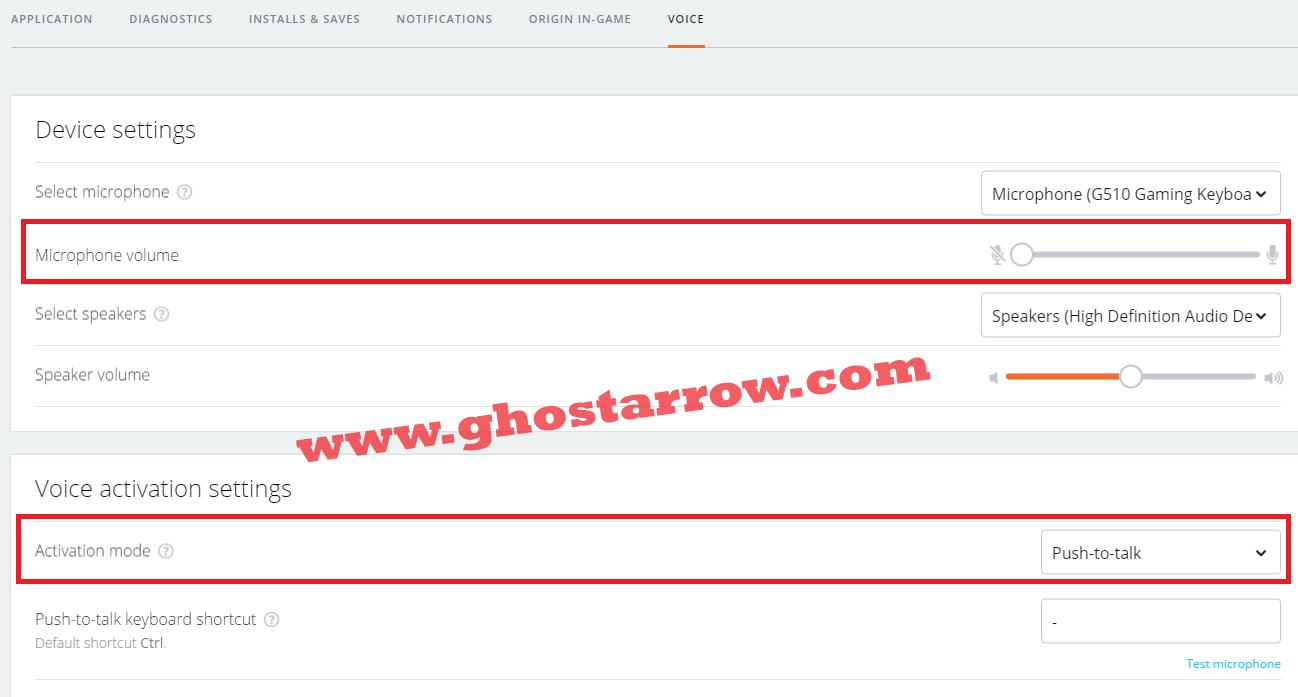
- Run the origin application.
- In the top left, click Origin
- Then click the Application Settings

- Go to the Voice tab
- Minimize the Microphone volume.
- Also, change the Activation mode to Push-to-talk.
Method #2
We're gonna add a fake microphone and make the game use that microphone. If you have another microphone, you can use it too. So our voice will not be heard in the voice chat. It works on Windows 10.
- Download the "VB-CABLE Virtual Audio Device" driver.
- Unzip the VBCABLE_Driver file.
- Right-click on VBCABLE_Setup_x64.exe and select Run as administrator.
- After installation, launch Star Wars Battlefront 2.
- Press ALT+TAB
- Right-click the speaker icon at the bottom right.
- Click the Open Sound settings

- Go to the bottom of the window that opens.
- Click the "App volume and device preferences"

- Then in the STAR WARS Battlefront II line, use the "Input" drop-down list to select the "CABLE Output VB-Audio Virtual Cable".

Method #3
If you want to turn off the microphone in the game and use the microphone in Discord:
- Download the "VB-CABLE Virtual Audio Device" driver.
- Unzip the VBCABLE_Driver file.
- Right-click on VBCABLE_Setup_x64.exe and select Run as administrator.
- Install it.
- Go to Windows Start > Settings > System > Sound
(Windows 7 & 8: Start > Control Panel > Hardware and Sound > Sound) - Click on the "Sound Control Panel"
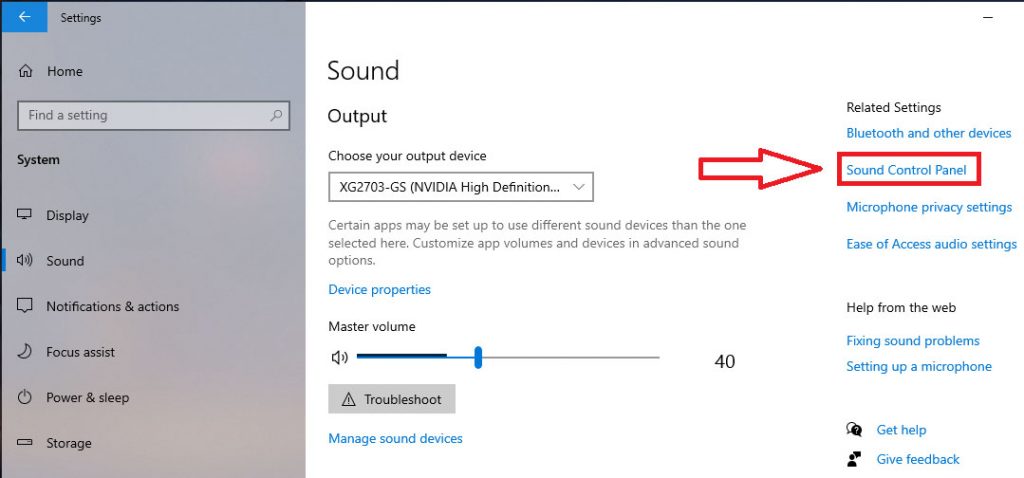
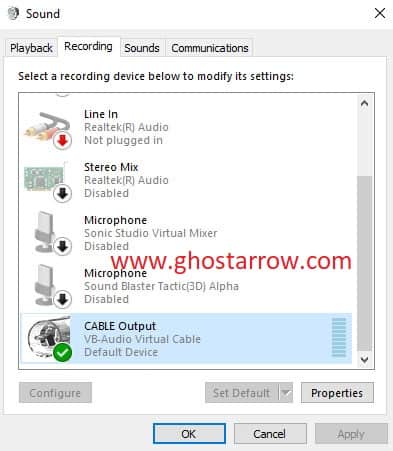
- Go to the "Recording" tab.
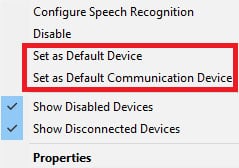
- Right-click on the "CABLE Output" and select "Set as Default Device"
- Right-click on it again and select "Set as Default Communication Device"
- Then open the Discord
- Go to User Settings > Voice & Video
- Use the "Input Device" drop-down list to select your microphone (Not CABLE Output!)
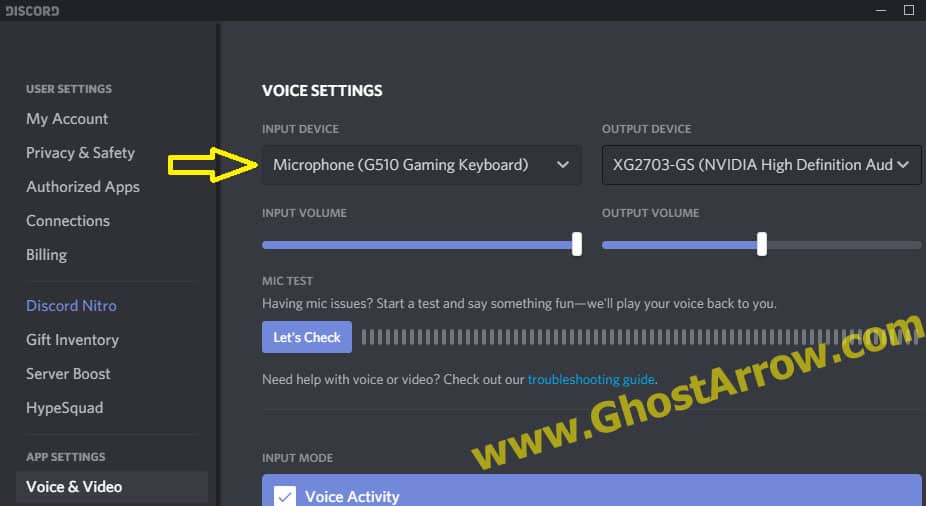
That's all! Your microphone is disabled in the game.
Note: If you experience a problem with the sound after installing the program, you should choose your output device in the Sound settings.

You should also check out this video


there is no voice tab
Thank you so much!! Third one fixed my problem.
I solved it. Thanks for the guide but I had to change default device under Recording in "sound control panel" to Cable output but it doesn't work the first time you make this change because it seems like the real mic is still and also set as default. Now it says default communications device on the Cable output and it really disables the mic in the game but it works in Discord.
Thanks for sharing it.